This may be the most straightforward project you can try! This tutorial teaches you how to make resin jewelry from flowers. Resin jewelry items may look complicated to make. Mixing flowers with resin can take a long time, and you must watch out for the air bubbles that form during the process. That’s why most people avoid the thought of crafts, fearing that the process of making them will be very complicated and make a mess of things, but after seeing such a beautiful resin craft, they decided to try it.
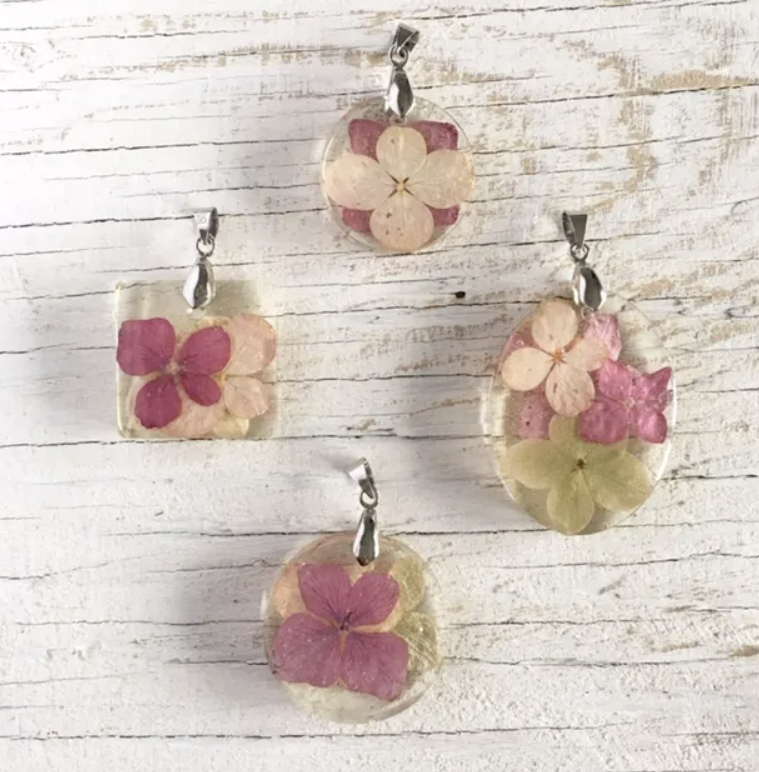
Table of Contents
How do I get dried flowers?
You can go to your local florist to get them —— And More 5 Ways To Get Dried Flowers
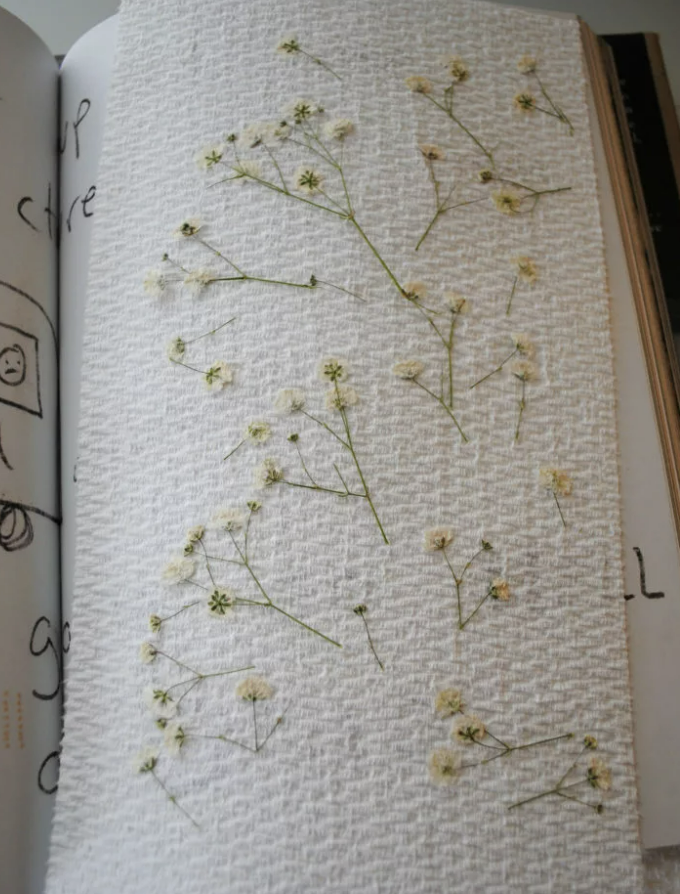
The most critical factor in preserving resin flowers is ensuring they are dehydrated! We list the following methods.
- Air dry (leave the flowers in a well-ventilated and dark environment for a few weeks)
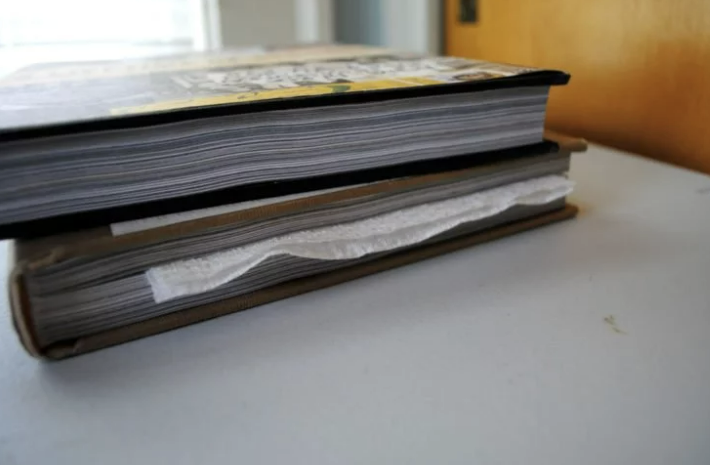
- sandwich in a book (clamp the flowers flat between the pages of the book, close the book or carefully turn to another page and repeat the process, the paper will absorb the moisture from the flowers. After a few repetitions, I will put a few more thick books on top, about two weeks of pressure)
- paper towels (so far readily available, use dry paper towels to wrap the flowers to absorb the water)
- Iron (you can use an iron to iron the petals until they are dry)
- dry powder (it is beneficial to cover the flowers with dry powder for a few days)
When you finish the pre-petal drying work, we can start to make the resin. If any moisture is left in the petals, it will react with the resin, rot for a few weeks, and change color (usually to an unsightly brown color).
Materials needed to make these resin pendants from flowers.
- Jewelry resin molds
- plastic cups (measuring cups)
- dried flowers
- Necklace or string
- Disposable gloves
- Lighter or heat gun
- Paper towel
- Resin
- Tweezers
- Wooden sticks
- toothpick
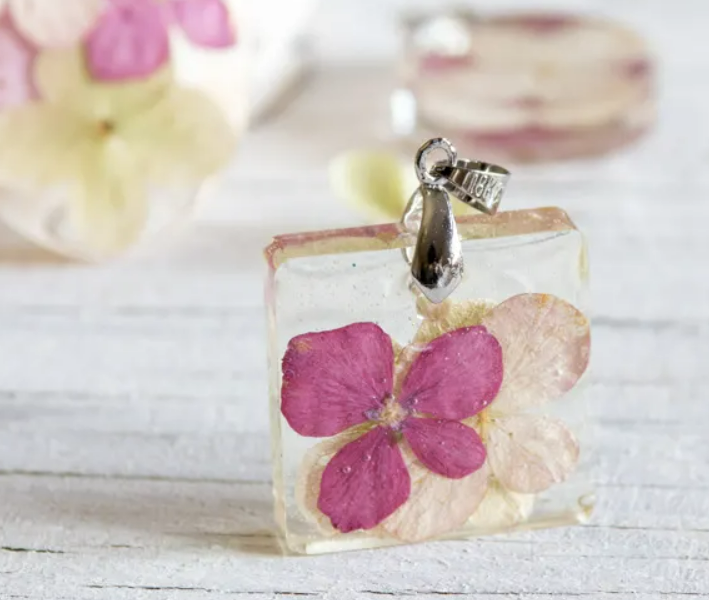
How to make embossed jewelry resin
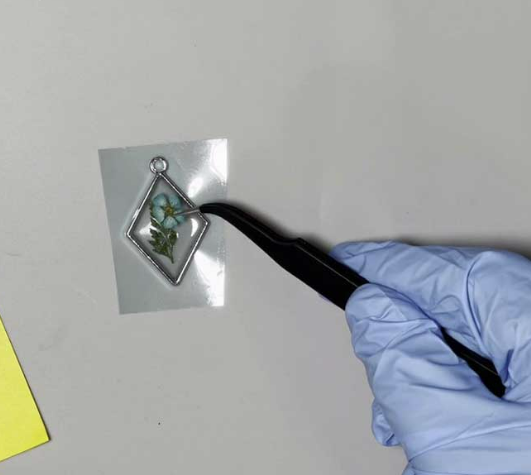
Check the size of the dried flowers and choose a jewelry mold that fits their size. You may need to trim them to fit inside the mold.
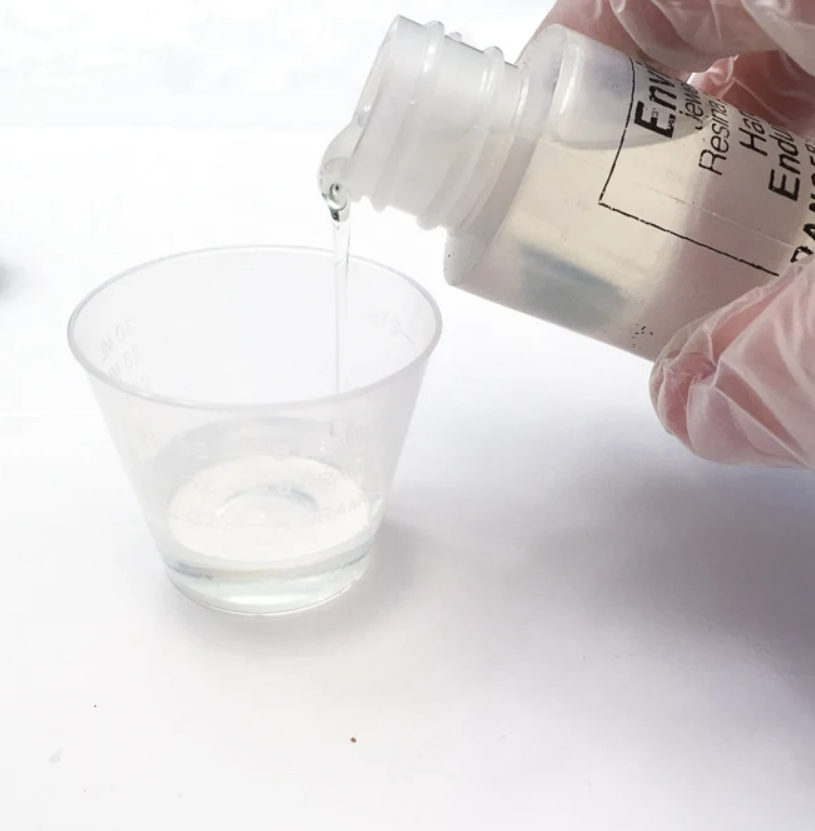
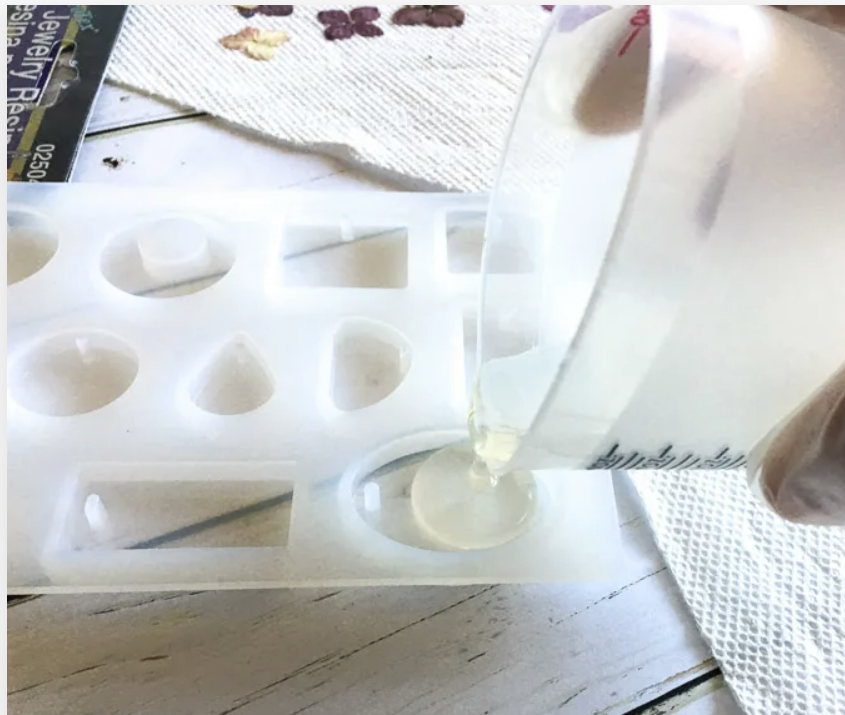
Mix the resin
Next, put on gloves (to avoid getting resin on your hands) and introduce equal amounts of resin/hardener into a measuring cup. Stir continuously and slowly with a wooden stick to mix thoroughly together.
Pour the resin slowly into the mold.
Introduce resin mixture into the jewelry item mold, just enough to cover the bottom of the mold. Use a wooden stick to spread its resin evenly to the blank corners of the mold.
💡TIP: Don’t pour in too much. You need to run out of space for the second layer of resin.
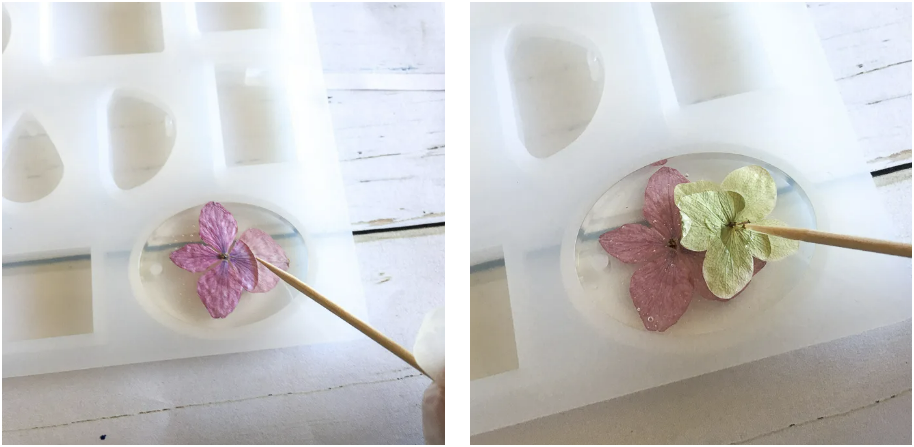
Add dried flowers
Use tweezers to gently pick up the dried flowers and arrange them on the first layer of resin. Be sure to check for air bubbles around the base of the flower and remove them with a toothpick. You can use a toothpick to push the dried flowers to the desired position. Then wait 24 hours for the resin to fully cure.
💡TIP: The process is covered to prevent dust from falling in.
Fill the second layer of resin
Once the bottom of the mold has cured, slowly pour another layer of epoxy resin on the surface, starting from the center, to ensure that all corners of the mold are covered with a slower flow rate. Be careful not to pour in too much.
After pouring enough of the resin mixture, a rounded dome will form at the top, and I filled in the edges to avoid any spillage. Then stir the resin with a wooden stick to add more drops to saturate the resin in the mold.
Removing air bubbles
During the process of pouring resin, some fine bubbles will be generated. The quickest way to remove them is to use the flame of a lighter to heat the surface of the resin, do not let the assay come into direct contact with the resin. Just sweep it close to the surface for 2-3 seconds a few times, and you’re done.
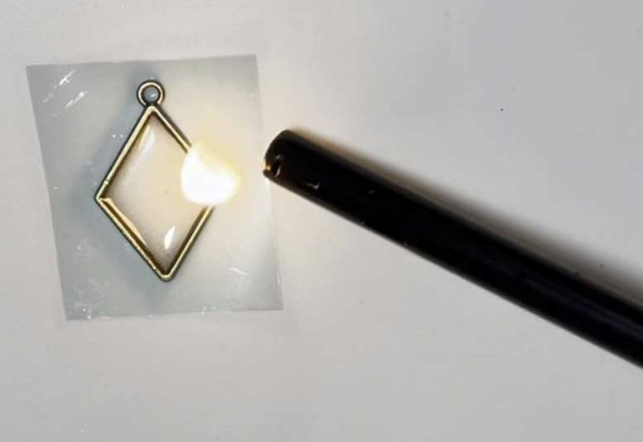
If you think a lighter is not convenient enough, you can use a heat gun to blow out the air bubbles from the top of the resin.
💡TIP: If flame debubbling doesn’t work for your current situation, there are 13 other ways to get rid of bubbles to try.
Finally, please place it in a sealed environment and wait 24 hours for it to cure. Once the resin is no longer sticky, you’ve done it!
Start enjoying your creations!
Tips Q & A.
Is o resin a good material for jewelry making?
Yes, it says a very delicate-looking jewelry material because it dries crystal clear. Use embossing to make resin jewelry pieces that will last forever and are memorable.
Is resin jewelry costly to make?
The resin may be a little more expensive than other jewelry items, and you may need to purchase other accessories during the making process.
Usually, a two-part epoxy kit is around $20, but usually, you use a bottle of resin to make about four to eight pieces of jewelry, sometimes more!
Does resin jewelry break easily?
No, it’s very durable. But that doesn’t mean it’s harder than diamonds. Resin can also be scratched. If the scratch is not deep, you can repair it by sanding it with 400 grit sandpaper until it is smooth.
Is resin jewelry toxic?
The resin component in liquid form is toxic. However, it can be protected by following the preparation materials listed above. Having said that, when the resin mixture is fully cured, it is safe and non-toxic.