Do you want to know if there are questions about how to make dice? You don’t need to think about how to make dice. I will show you how to make ready-made silicone dice from silicone molds. You can have more fun playing dice, board, and role-playing games with homemade dice.
This is an exciting project. You have many options to color your dice. I will show you different design ideas during the dice-making process and help you design your unique dice.
We will then list what you need to do to prepare and what materials you need.

Table of Contents
Resin dice-making tools and supplies
Let’s discuss the materials you need to prepare for dice making!
Here is a list of the materials and tools we need for you to make resin dice.
✍Materials:
- silicone dice molds (the dice molds included here can be found in our store, the sets contain different sizes and shapes and have very sharp edges, as well as dice that are good for creating shiny surfaces)
- Resin (we recommend you to use ours)
- coloring agents (alcohol ink, mica powder, metal leaves, etc.)
- Acrylic paint or fine-tipped markers (for drawing numbers, we recommend using yo, permanent markers)
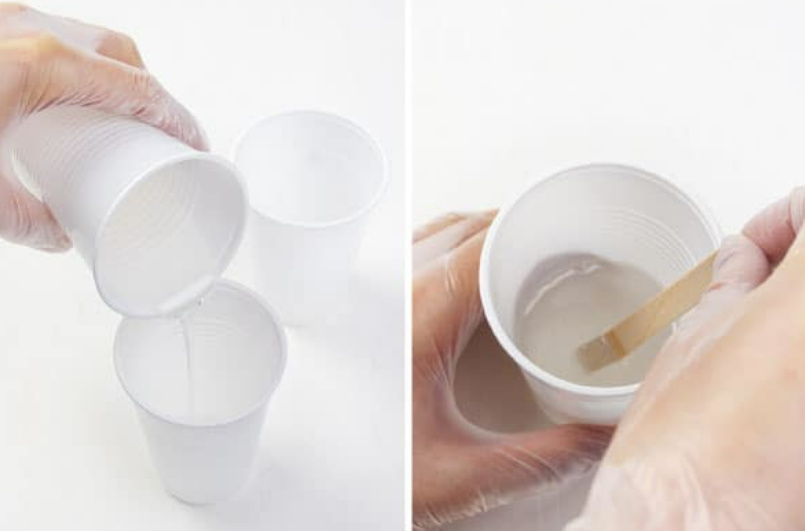
Tools. - mixing cup (disposable is highly recommended for mixing resin)
- Mixer (wooden is recommended for mixing resin with hardener and colorant)
- Gloves (to prevent your hands from coming into contact with the resin)
- Mask (to help you not get hurt by resin fumes)
- Drip paper/newspaper (to prevent hard-to-remove resin from your table or workbench)
- Plastic straw (for removing excess)
Resin dice molds
Our resin dice molds can create your desired, unique dice with clear, sharp edges and a smooth surface that reminds you of beautiful crystals.
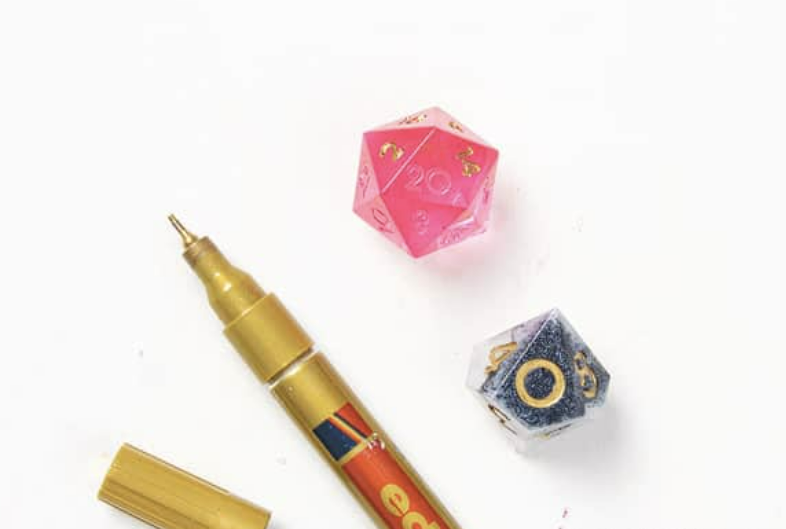
Since the numbers on the dice are very small, you need to use a fine nib to ink them, making them color very precisely.
Different types of dice
- The dice set contains many types of polyhedra. Polyhedral means that each die consists of multiple planes of the same size: the
- D4 (Tetrahedron): This triangular dice has 4 faces with 3 numbers on each face. This die only has 4 numbers arranged so that the numbers have the same vertices on all 3 faces. d4 is usually thrown up in the air because it doesn’t roll very well.
- D6 (cube): You may be familiar with the classic 6-sided dice from the family board game. The standard dice are shaped like a cube, showing the numbers 1 through 6. The sum of the numbers on both sides is 7.
- D8 (Octahedron): Each side of this 8-sided die resembles a triangle, and the dice look like 2 square pyramids connected at the bottom. The dice have the numbers 1 through 8 on them.
- D10 (triangle or pentagonal trapezoid): The faces of this 10-sided die resemble the shape of a kite. The die has two sharp corners, where the kite tips are attached. The dice are numbered 0 through 9, with half being even numbers and the other half being odd numbers. The total when the opposite numbers are added together is 9.
- D12 (Dodecahedron): This variety has 12 faces, each resembling a pentagon. The sum of the relative faces is 13.
- D20 (icosahedron): The set also includes a small and large D20, a popular game dice. This type consists of a square triangle with 20 sides, showing the numbers 1 to 20, with relative faces equal to 21.
- As well as many more
How are dice mold used 3 tips
How you can make your dice unique dice! While DIY dice can be complicated, they are very, very simple. Here’s what we’ve designed for you and the essentials.
First, we need to understand how dice molds work.
You may not understand how to use them when you first use them. Let me show you.
- Each silicone mold has two parts. One is the container, and the other is the lid with a small pouring hole.
- The container has grooves around the perimeter that extend around the rim. The top of the lid has a tongue, while the protruding figures are at the bottom of the container.
- To assemble the mold, place the lid with the numbered side facing down on the container. Then insert the tongue into the groove to lock the dice die.

The next step is to prepare
- You must ensure your work area is clean and dust-free and lay out a piece of fallen paper or old newspaper.
- Gather all the tools and materials and assemble the dice resin mold
- Wear gloves and a mask to protect yourself
Mixing resin
- Resin and hardener are 1:1 volume ratio. So you need to mark 2 disposable plastic cups with measuring lines. You will need about 8/1 cup of resin and hardener mix for each of your 7 molds.
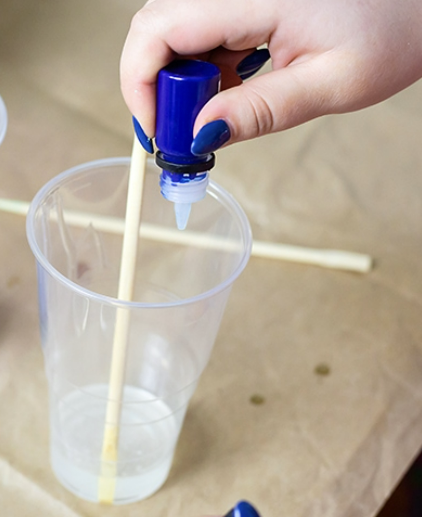
- Measure out equal amounts of resin and hardener in the cups. You use a stirring stick and stir for 5 minutes. Mix the resin thoroughly until you see no more streaks between the resin and hardener, and you see a very clear mixture.
Coloring the resin
If you need to make your dice prettier, stir the colorant into the resin until it is completely dispersed. (You can also add some glitter, etc.)
Filling the mold
Use a plastic straw to draw resin from a disposable plastic cup and fill the mold right through the hole in the lid. The pipette should be moved around inside the mold while injecting the resin to cover all areas and corners. Fill until it overflows from the hole in the lid, then stop. Check the mold from all four sides to see if you want to continue filling.
Wait for curing
To allow the resin to cure where room temperature will not be affected. It will take approximately 8 to 12 hours but may take 24 to 48 hours.
Demold
Once the resin has cured, slowly demold. Remove the cover and carefully pull the mold to release the resin dice. (Be very careful with your dice, oh)
Removal of sprue
Using a hobby knife or scissors, remove the sprue (the raised part where the resin was injected), any additional resin you find unsightly, and the edges of the dice.
Polishing to ink the numbers
Your dice can be polished if you feel the surface is not smooth enough. We recommend using P150 sandpaper to start. Sand your dice, but be careful not to remove too much resin. You need to continue sanding next, use P180 sandpaper and then continue with P220 sandpaper. Continue with P240 sandpaper, etc., until you are satisfied that your dice are thoroughly clean and smooth.
To finish the dice the way you like them, you will need to keep using P3000 sandpaper, allowing you to achieve the final finish. To keep dust to a minimum, you can use water between each sanding session.
Color the numbers and fill them in with a permanent marker. If you accidentally leave a marker on the dice, wipe it off quickly with a damp paper towel.
💡Making Tips
- You can work in a well-ventilated area to protect yourself.
- To protect your skin, stop work is recommended to use soap and water for cleaning.
- To prevent the resin dice mold deformation is recommended to touch the mold when the resin is a soft release
- To keep the bubbles in a small amount, please stir the resin and hardener in a slow circular motion.
- If you are not sure whether the dice are cured or not, please judge by touching them.
- You can put (gold foil, mica, glitter or small items, etc.) when the resin is poured into the mold.