If you want to give your friend, colleague or partner a memorable gift, we can satisfy your DIY creativity with the use of resin molds! I love using resin. We can use it to make many Christmas resin exquisite gifts, your friends will be pleased when they receive such resin Christmas decorations, and it’s easier to make than you think!

Table of Contents
What are resin crafts?
Resin crafts are made of epoxy resin, a clear, sticky liquid. When mixed with a hardener, it dries and hardens, and it is fun to pour the resin into various resin molds. There are dozens of molds for resin crafts. You can click here to see our store’s popular Christmas resin molds.

Tools needed
- A piece of paper or old newspaper to lay on the work surface to avoid dust
- A wooden stick for stirring
- Gloves
- Measuring cup
- Christmas resin molds
- Mica powder
- Lighter or heat gun
- Resin
- Hardener
- toothpick
4 tips you must know before making resin christmas decorations
These tips will ensure the successful completion of your unique Christmas decorations!
- Mix the resin and hardener in a ratio of 1:1
- After mixing them with a wooden stick, wait at least 5-10 minutes for them to thoroughly blend. They will harden and stay sticky!
- When mixing, stir slowly and do not allow air to enter the mixture. Otherwise, air bubbles will be created in the resin.
- After pouring the resin into the mold, if there are still bubbles on the surface, you can use a hot air blower or lighter to sweep over the surface (slightly heated) to pop out the bubbles.
How to make Christmas resin ornaments?
We will list below a few simple steps to finish your christmas resin ornaments quickly at a glance!
Mix the resin
Pour out the right amount of epoxy resin and hardener (different brands vary slightly!) according to the instructions on the box. Add to the measuring cup and slowly stir the mixture with a wooden stick.

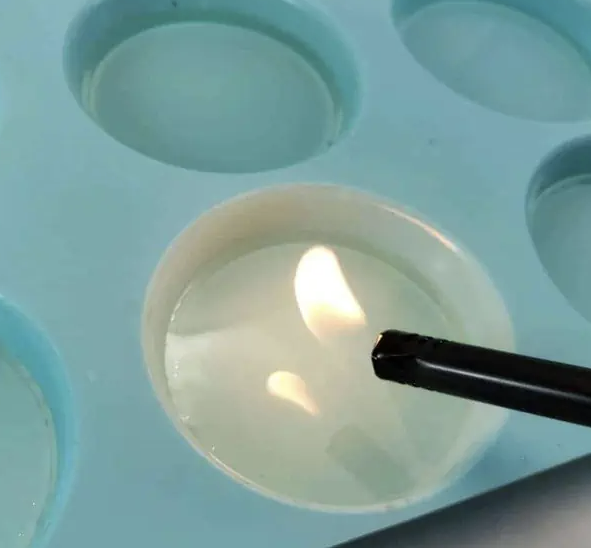
Introduce into the mold and getting rid air bubbles
After thorough mixing, introduce the resin mixture into the mold, pouring slowly along the edges until half full, carefully picking up the mold and shaking gently to distribute the resin to each corner to ensure that the resin is brought to the edge corners of the mold. Be careful not to create too many bubbles in the resin during the process. If bubbles form in the resin, you can use the tip of a toothpick to move along the edge of the mold to pierce the bubbles. Smaller bubbles require heating with a lighter on the surface of the resin, which will cause the bubbles to rise and pop.
💡TIP: 13 ways to getting rid air bubbles for different situations where it is difficult to remove
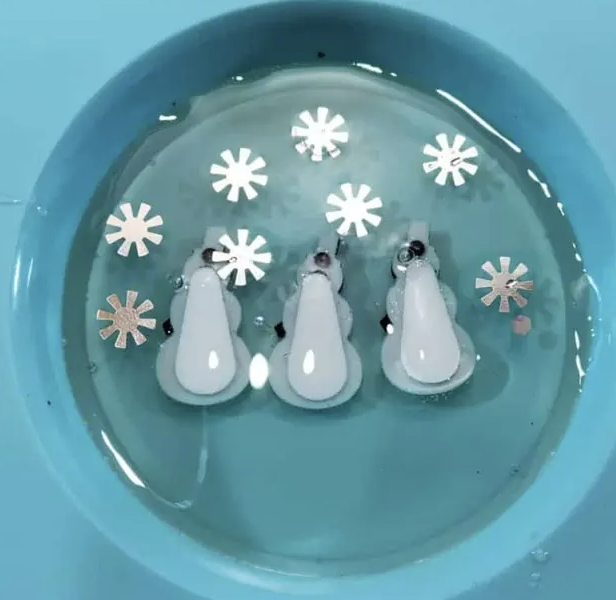
Adding decorations
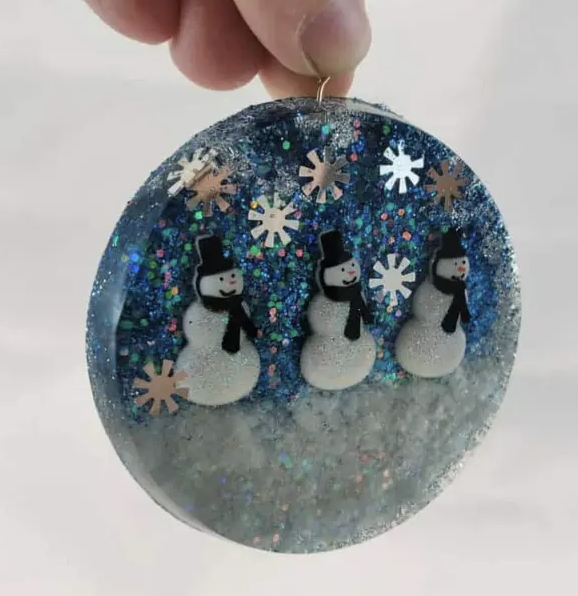
You can put Christmas festive accessories (beads, glitter patches, snowflakes, letters, snowmen) into the resin and place the paste side down. If you use letters, spell words backwards, as the actual effect is reversed when the piece is finished. Suppose you want to use mica powder (glitter). In that case, it will sink to the bottom, so I sprinkled white mica powder on the bottom half of the ornament to create a “snowy” landscape, then waited 8-10 hours for the resin to harden a bit, then sprinkled blue mica powder on the top half to create a “sky The top part is then sprinkled with blue mica powder to form a “sky” view. After that, wait about 10-12 hours for the resin to harden slightly but not fully cure. You can carefully release it from the mold and insert the jewellery eye pin into the top of the ornament.
Wait for complete drying and unmolding.
After waiting 24 hours for the Christmas resin ornament to dry completely, loosen the mold with a toothpick and then gently pull the mold away from the resin from the edge.
Finally, we hang your resin ornaments on the Christmas tree! Or give it to your friends, family, partner as a unique Christmas gift!